There are organizations where users desperately trying to get the Outlook mail client on there desktop for mailing purposes. They don’t realise that the IBM Notes client is more then mailing. It’s so much more. But for them who only need mail, IBM created a new service on Domino: IMSMO which is used for connecting Outlook clients to the Domino environment.
Here is the installation procedure for a Windows server in our lab. We decided only to allow local access from with our LAN. No internet access at this moment.
Requirements before we can start
- IBM Domino 9.0.1FP6 installed on the IMSA server
- ODS52
- Know what the URL is for connecting to the server for your Outlook clients. https://lenovolab04.demo.nl/traveler
- HTTPS enabled on the IMSA servers
- Enable Server/Internet Sites documents for the IMSA servers.
- Put $CSUID2APPTUNIDCONTROL=4 in the notes.ini file on all home/mail servers.
- ID-vault running
- Each user must have a mail replica on the IMSA server
- Each user must have a valid internet address
- Each user must have a valid internet password
- Each user must have a notes.id in the ID-vault
Download
Servers:
- IBM mail Add-on 2.0.0.1 (for IMSMO) Windows 64 bit Multilingual (CNBK6ML )
- IBM mail Add-on 2.0.0.1 (for IMSMO) AIX 64 bit Multilingual (CNBK7ML )
- IBM mail Add-on 2.0.0.1 (for IMSMO) Linux 64 Multilingual (CNBK8ML )
Client:
- IBM mail Add-in 2.0.0.1 (for IMSMO) Windows 32/64 bit Multilingual (CND43ML )
Admin Guide:
Installation
Stop all Domino processes
Start imsa_64.exe and finish the installation. Its simple as next-next-finish.
Start the Domino server again. A adminp request is created to unhide a tab in the corresponding serverdocument called “Microsoft Outlook”.
Edit the Server document and add the Password management URL: https://lenovolab04.demo.nl/profile/password
Microsoft Outlook

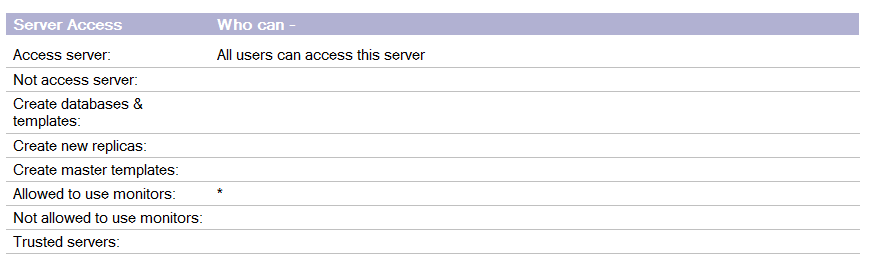
Security tab
Access server must set to all Outlook users. In this case we decided to allow all users.
Notes.ini
When you have more active network interfaces on this server, you have to specify the listener ipaddress.
nts_host_ip_addr=192.168.0.4
Next you have to specify the url for connecting the this server:
nts_external_url=https://lenovolab04.demo.nl/traveler
Transactional Logging
Quota enforcement: Check space used in file when adding a note

HTTP
Attachment size limits must be set slightly to above your limit.
We choose to set the limit to 30MB
HTTP – HTTP Protocols – Limits – Maximum size of request content: 30000
( also apply this setting in the Internet Site document )
Edit or create the configuration document.
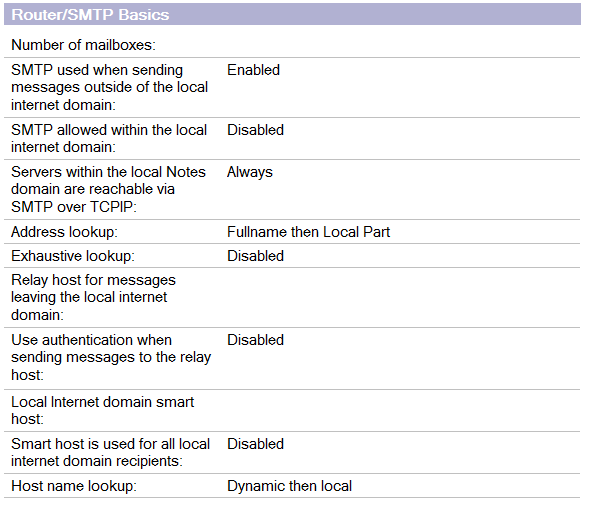
Set the correct address lookup and SMTP setting
Router/SMTP – Basics – Address Lookup: Fullname then Local Part
Router/SMTP – Basics -SMTP allowed withen the local internet domain: Disabled
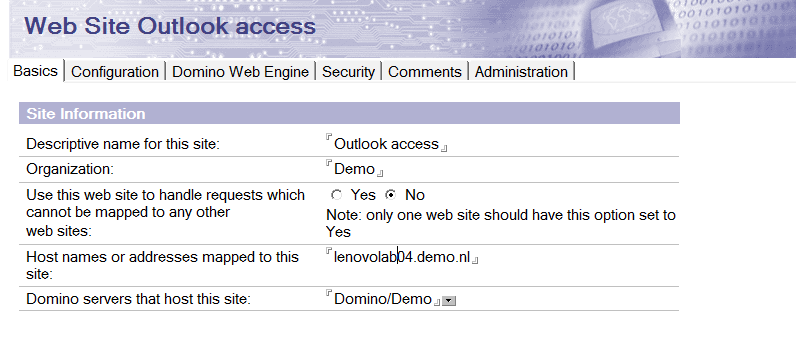
Create a Internet Site document
Basics
Fill in the correct rule and set the IMSA server as the host.
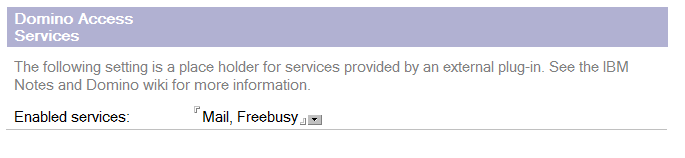
Configuration
Enable REST services by adding them manually.
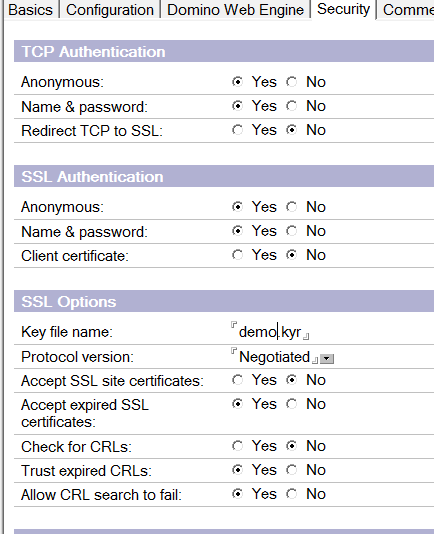
Security
Check or set the correct Key file name.
Domino Web Engine
Attachment size limits must be set slightly to above your limit.
We choose to set the limit to 30MB
Internet Site Document – Internet Protocols – Domino Web Engine – POST data – Maximum POST data: 30000
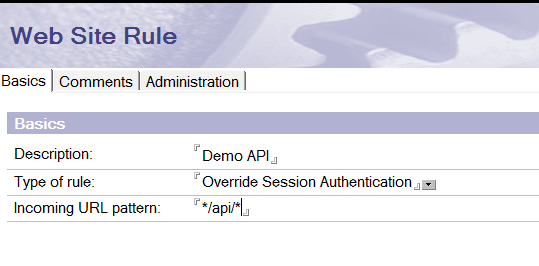
Create an extra rule for Overriding Session Authentication
Now you can restart the HTTP service in Domino to activate all changes: res ta http
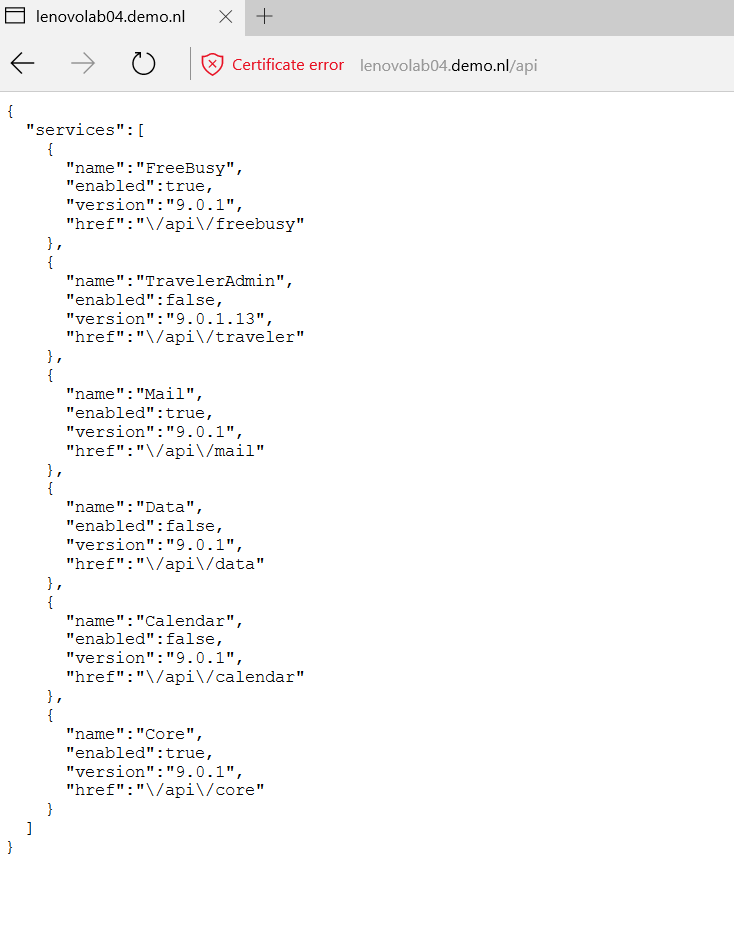
After restarting, we have to check the REST services:
https://lenovolab04.demo.nl/api
When you see a services response, everything is working fine.
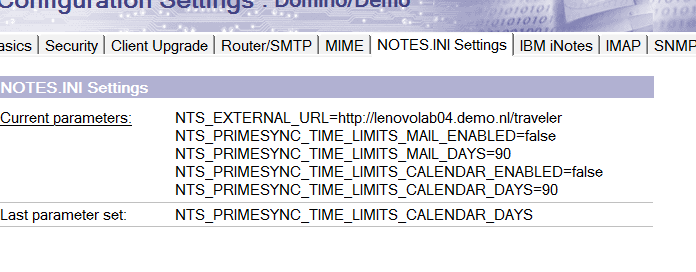
Now we can set the Amount of data what will be synced to Outlook when first connected.
Edit the configuration document again and add several settings to notes.ini.
NTS_PRIMESYNC_TIME_LIMITS_MAIL_ENABLED=false
NTS_PRIMESYNC_TIME_LIMITS_MAIL_DAYS=value
NTS_PRIMESYNC_TIME_LIMITS_CALENDAR_ENABLED=false
NTS_PRIMESYNC_TIME_LIMITS_CALENDAR_DAYS=value
Restart the Traveler service in order to activate above settings.
When you have Resources ( Rooms, etc. ) you have to add an internet email address on every resource.
Finally, now we can configure the Outlook client.
We installed Outlook 2016 from the Office365 download bundle, this one is working perfectly.
After Outlook installation, don’t start the Outlook client. you first have to install the IMSMO protocol and add-in for Outlook.
Now install the IMSMO add-in, and again…..simple as next-next-finish.
(If you decided to use a selfsigned SSL certificate ( test or POC server ), you have to import the CER ( certificate ) into Windows.)
Next you have to set a Outlook profile, connected to ISMSO.
Open the Windows explorer and type in the following command:
imsmo:add_account?server=lenovolab04.demo.nl&profile=IBM&email=outlook.user%40demo.nl&display=OutlookUser
Now you can start Outlook and connect to the server.
Views: 3191